

架構圖
  sequenceDiagram
    participant Ubuntu as 💻 Ubuntu 本機
(Certbot)
    participant LE as 🛡️ Let's Encrypt
(憑證機構)
    participant CF as ☁️ Cloudflare
(DNS 伺服器)

    Ubuntu->>LE: 1️⃣ 發起憑證申請 (example.com)
    LE-->>Ubuntu: 2️⃣ 要求 DNS-01 驗證
(給予 _acme-challenge TXT 隨機碼)

    rect rgb(251, 255, 3)
    Note over Ubuntu,CF: 自動化 DNS 驗證階段
    Ubuntu->>CF: 3️⃣ 透過 API 新增 TXT 紀錄
    Ubuntu->>LE: 4️⃣ 通知驗證:我設定好了,請查驗
    LE->>CF: 5️⃣ 查詢網域的 TXT 紀錄
    CF-->>LE: 回傳 TXT 紀錄內容
    end

    LE-->>Ubuntu: 6️⃣ 核對無誤,驗證通過!
正式核發 SSL/TLS 憑證

    Ubuntu->>CF: 7️⃣ 透過 API 刪除 TXT 紀錄 (自動清理)
    Note over Ubuntu: 8️⃣ 憑證存檔於本機
/etc/letsencrypt/live/
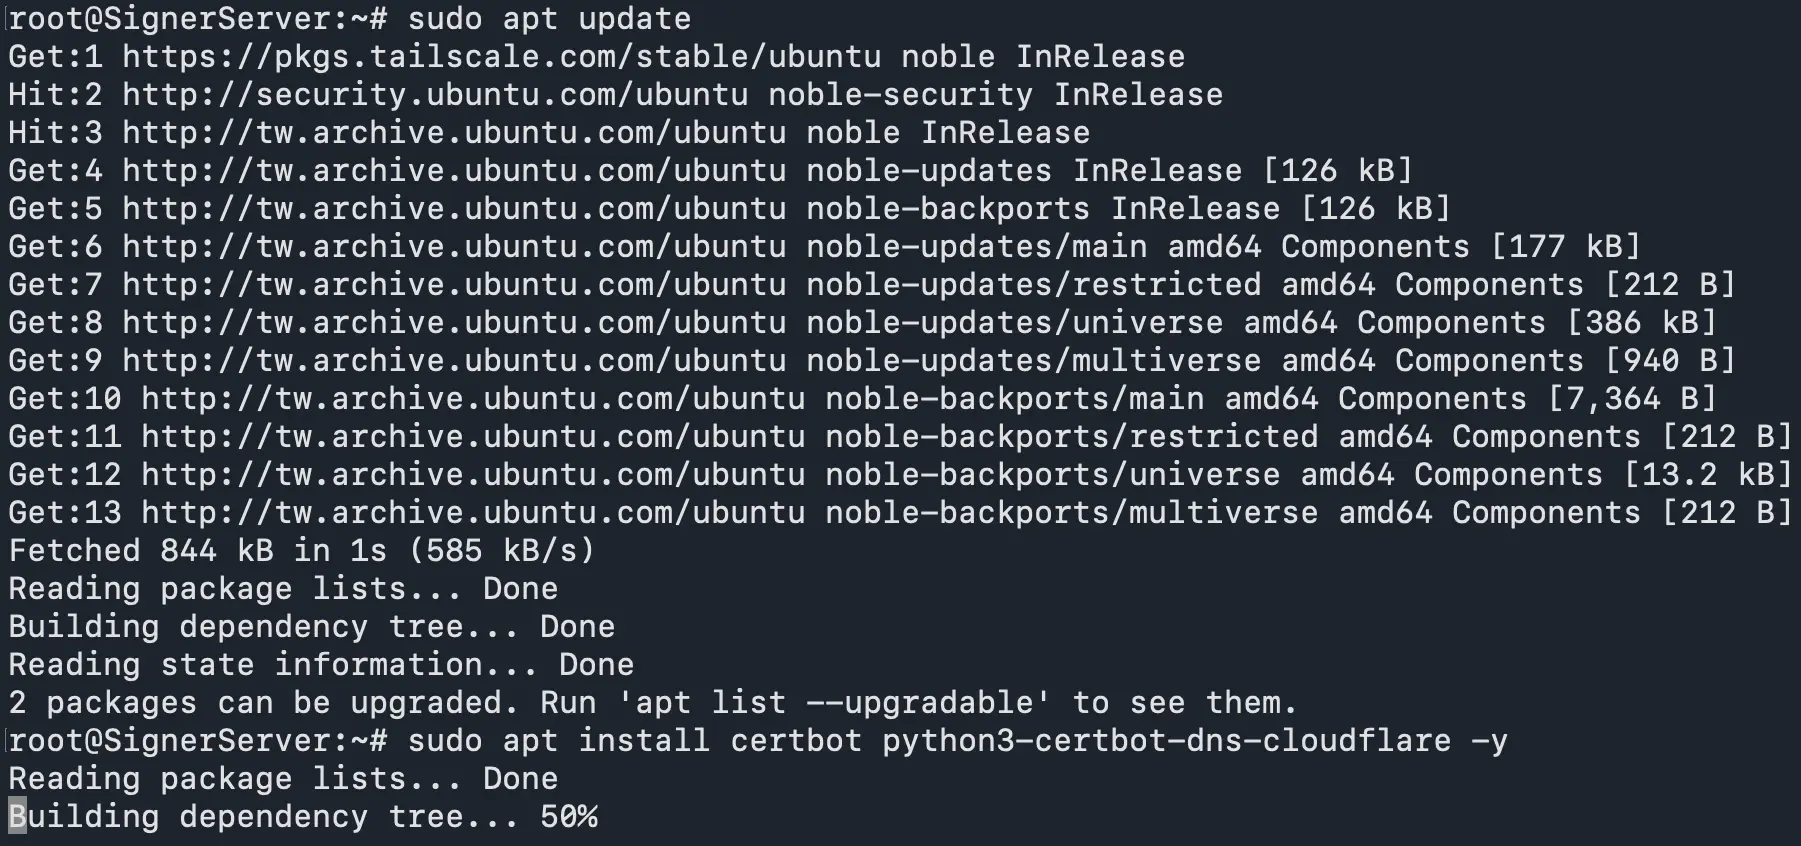
安裝 certbot
sudo apt update
sudo apt install certbot python3-certbot-dns-cloudflare -y
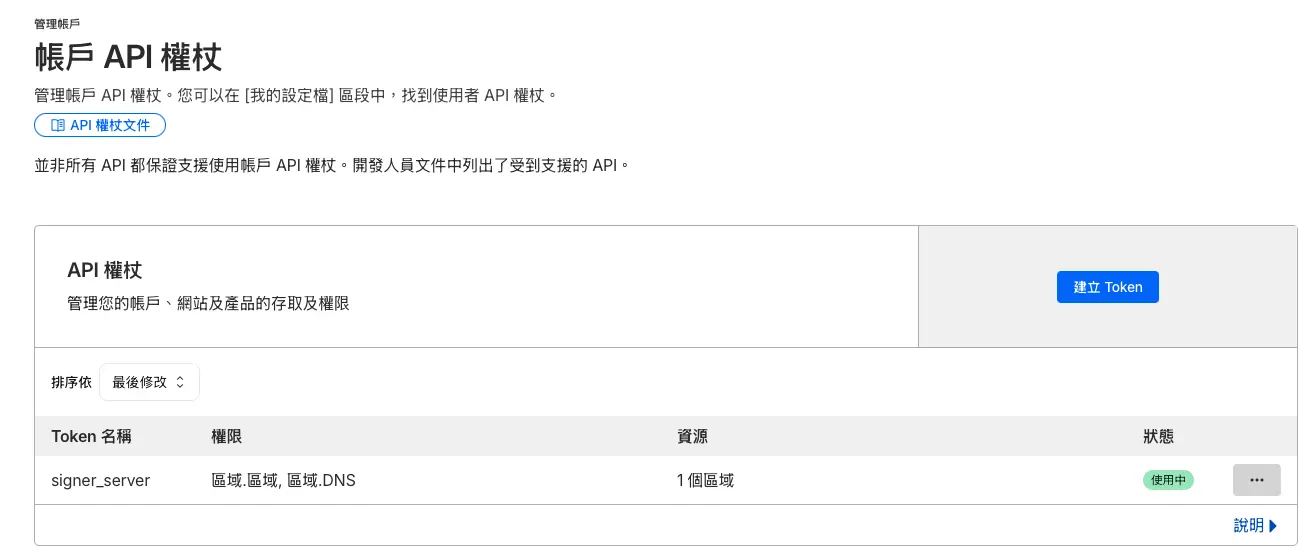
建立 Cloudflare API Token
管理帳戶->api權杖
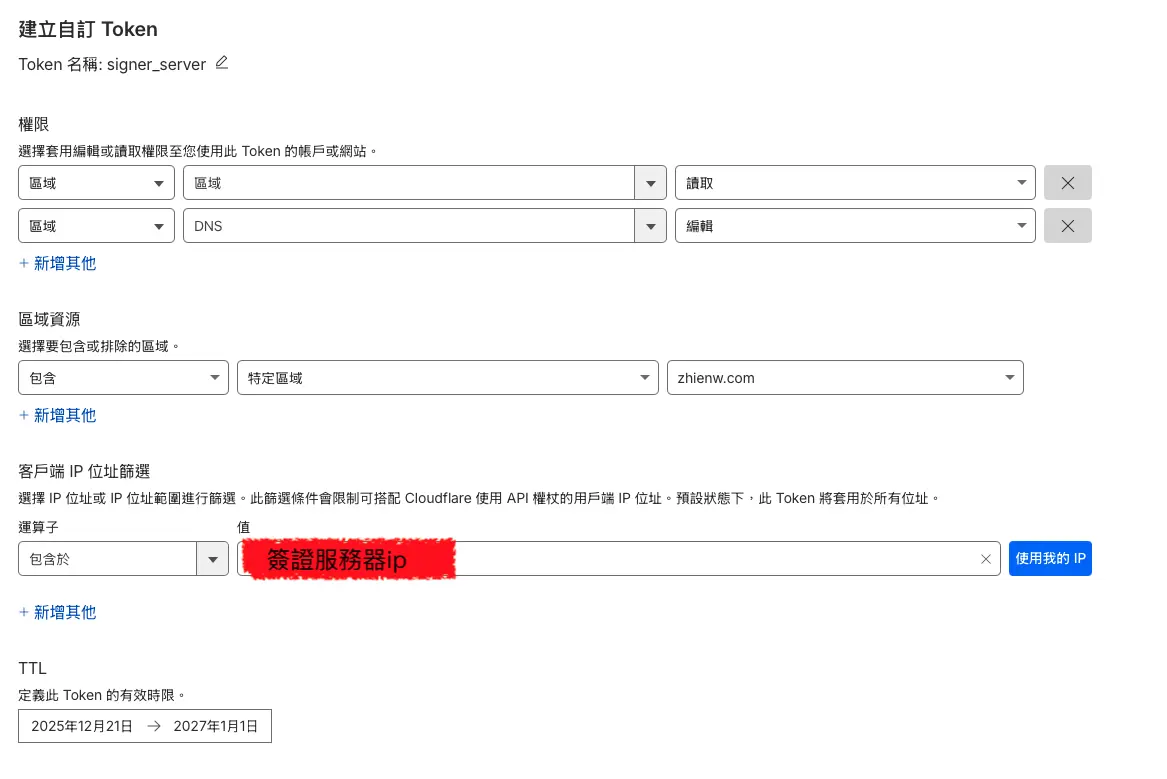
 設定權杖權限
在 Ubuntu 建立憑證設定檔
sudo mkdir -p /root/.secrets
sudo nano /root/.secrets/cloudflare.ini
 寫入以下內容
dns_cloudflare_api_token = YOUR_API_TOKEN
 設定權限
設定權限
sudo chmod 600 /root/.secrets/cloudflare.ini

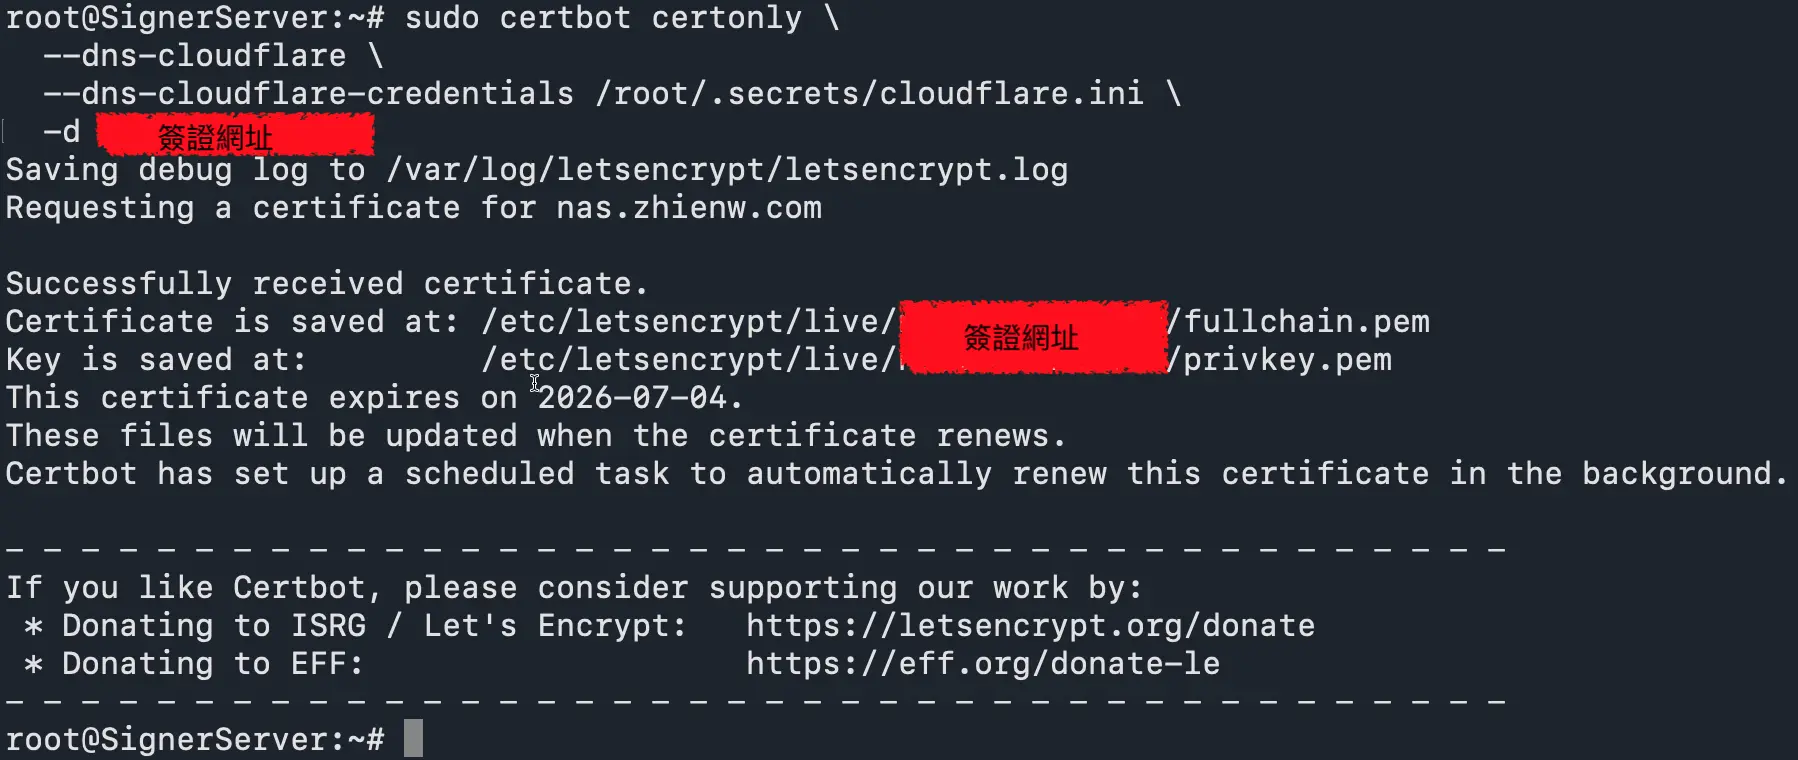
產生憑證
sudo certbot certonly \
  --dns-cloudflare \
  --dns-cloudflare-credentials /root/.secrets/cloudflare.ini \
  -d example.com \
  -d *.example.com
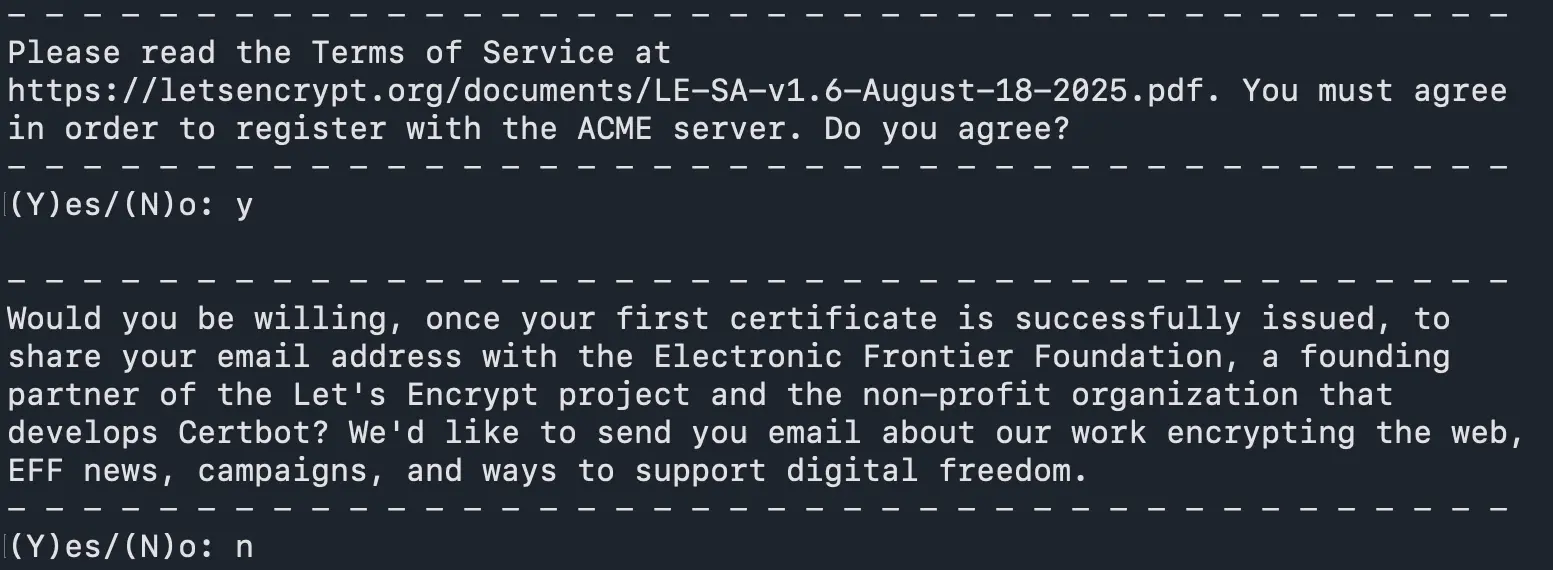
如果第一次簽憑證,會出現以下訊息:
- Terms of Service:這是 Let’s Encrypt 使用條款,不接受就不能簽憑證。
- 是否分享 Email 給 EFF 收電子報:建議輸入 N 後按 Enter。
成功
Congratulations! Your certificate and chain have been saved at:
 /etc/letsencrypt/live/example.com/fullchain.pem
 /etc/letsencrypt/live/example.com/privkey.pem
憑證用途

| 檔案名稱 | 檔案內容 | 主要用途與說明 |
|---|---|---|
| fullchain.pem | 伺服器憑證 + 中繼憑證 | 最常用。包含完整憑證信任鏈,多數現代伺服器軟體(如 Nginx, ESXi)都要求使用這個檔案。 |
| privkey.pem | 私鑰 (Private Key) | 絕對機密。伺服器用它來解密資料和建立安全連線,設定網頁伺服器時需指定此檔案。 |
| chain.pem | 中繼憑證 | 輔助用途。主要用於 Nginx 開啟 OCSP Stapling 功能,或是舊版伺服器需獨立指定時使用。 |
| cert.pem | 僅包含伺服器憑證 | 不建議單獨使用。缺少中繼憑證可能導致部分瀏覽器跳出「憑證不安全」的警告。 |
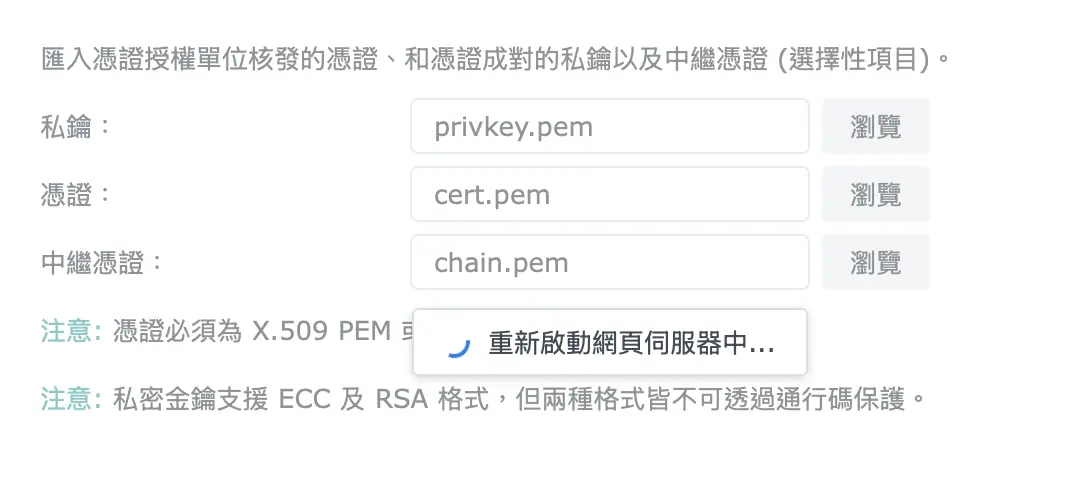
安裝憑證(以Synology Nas為例)
控制台->安全性->憑證
說些什麼吧!